Browsing all posts tagged photography

Lately I've been thinking about image post-processing a fair amount. This is partly due to my shooting more photos, which subsequently need to be processed before I share them (I shoot in RAW). Post-processing is an area where I feel I have room to improve as a photographer. Most of the room for improvement comes down to the time I'm willing to put into the post-processing step. Often, I'm eager to share my photos, and will do only a small amount of editing to minimize the time necessary for that step. Investing time in this step, however, can often result in better photos. It's a deep rabbit hole, however, and I occasionally find myself asking "how far is too far?" when it comes to photo adjustments.

The tutorial videos I've seen online run the spectrum of possibilities. Some photographers treat their images very conservatively, making only the bare minimum changes to bring out the best of the photo. Others seemingly "run amok" with changes: from removing parts of the scene, to wildly adjusting the color of the lighting (often to make it appear that the photo was taken at a different time of day). Personally, I think I tend to lean towards the former thinking: adjusting only what's necessary.

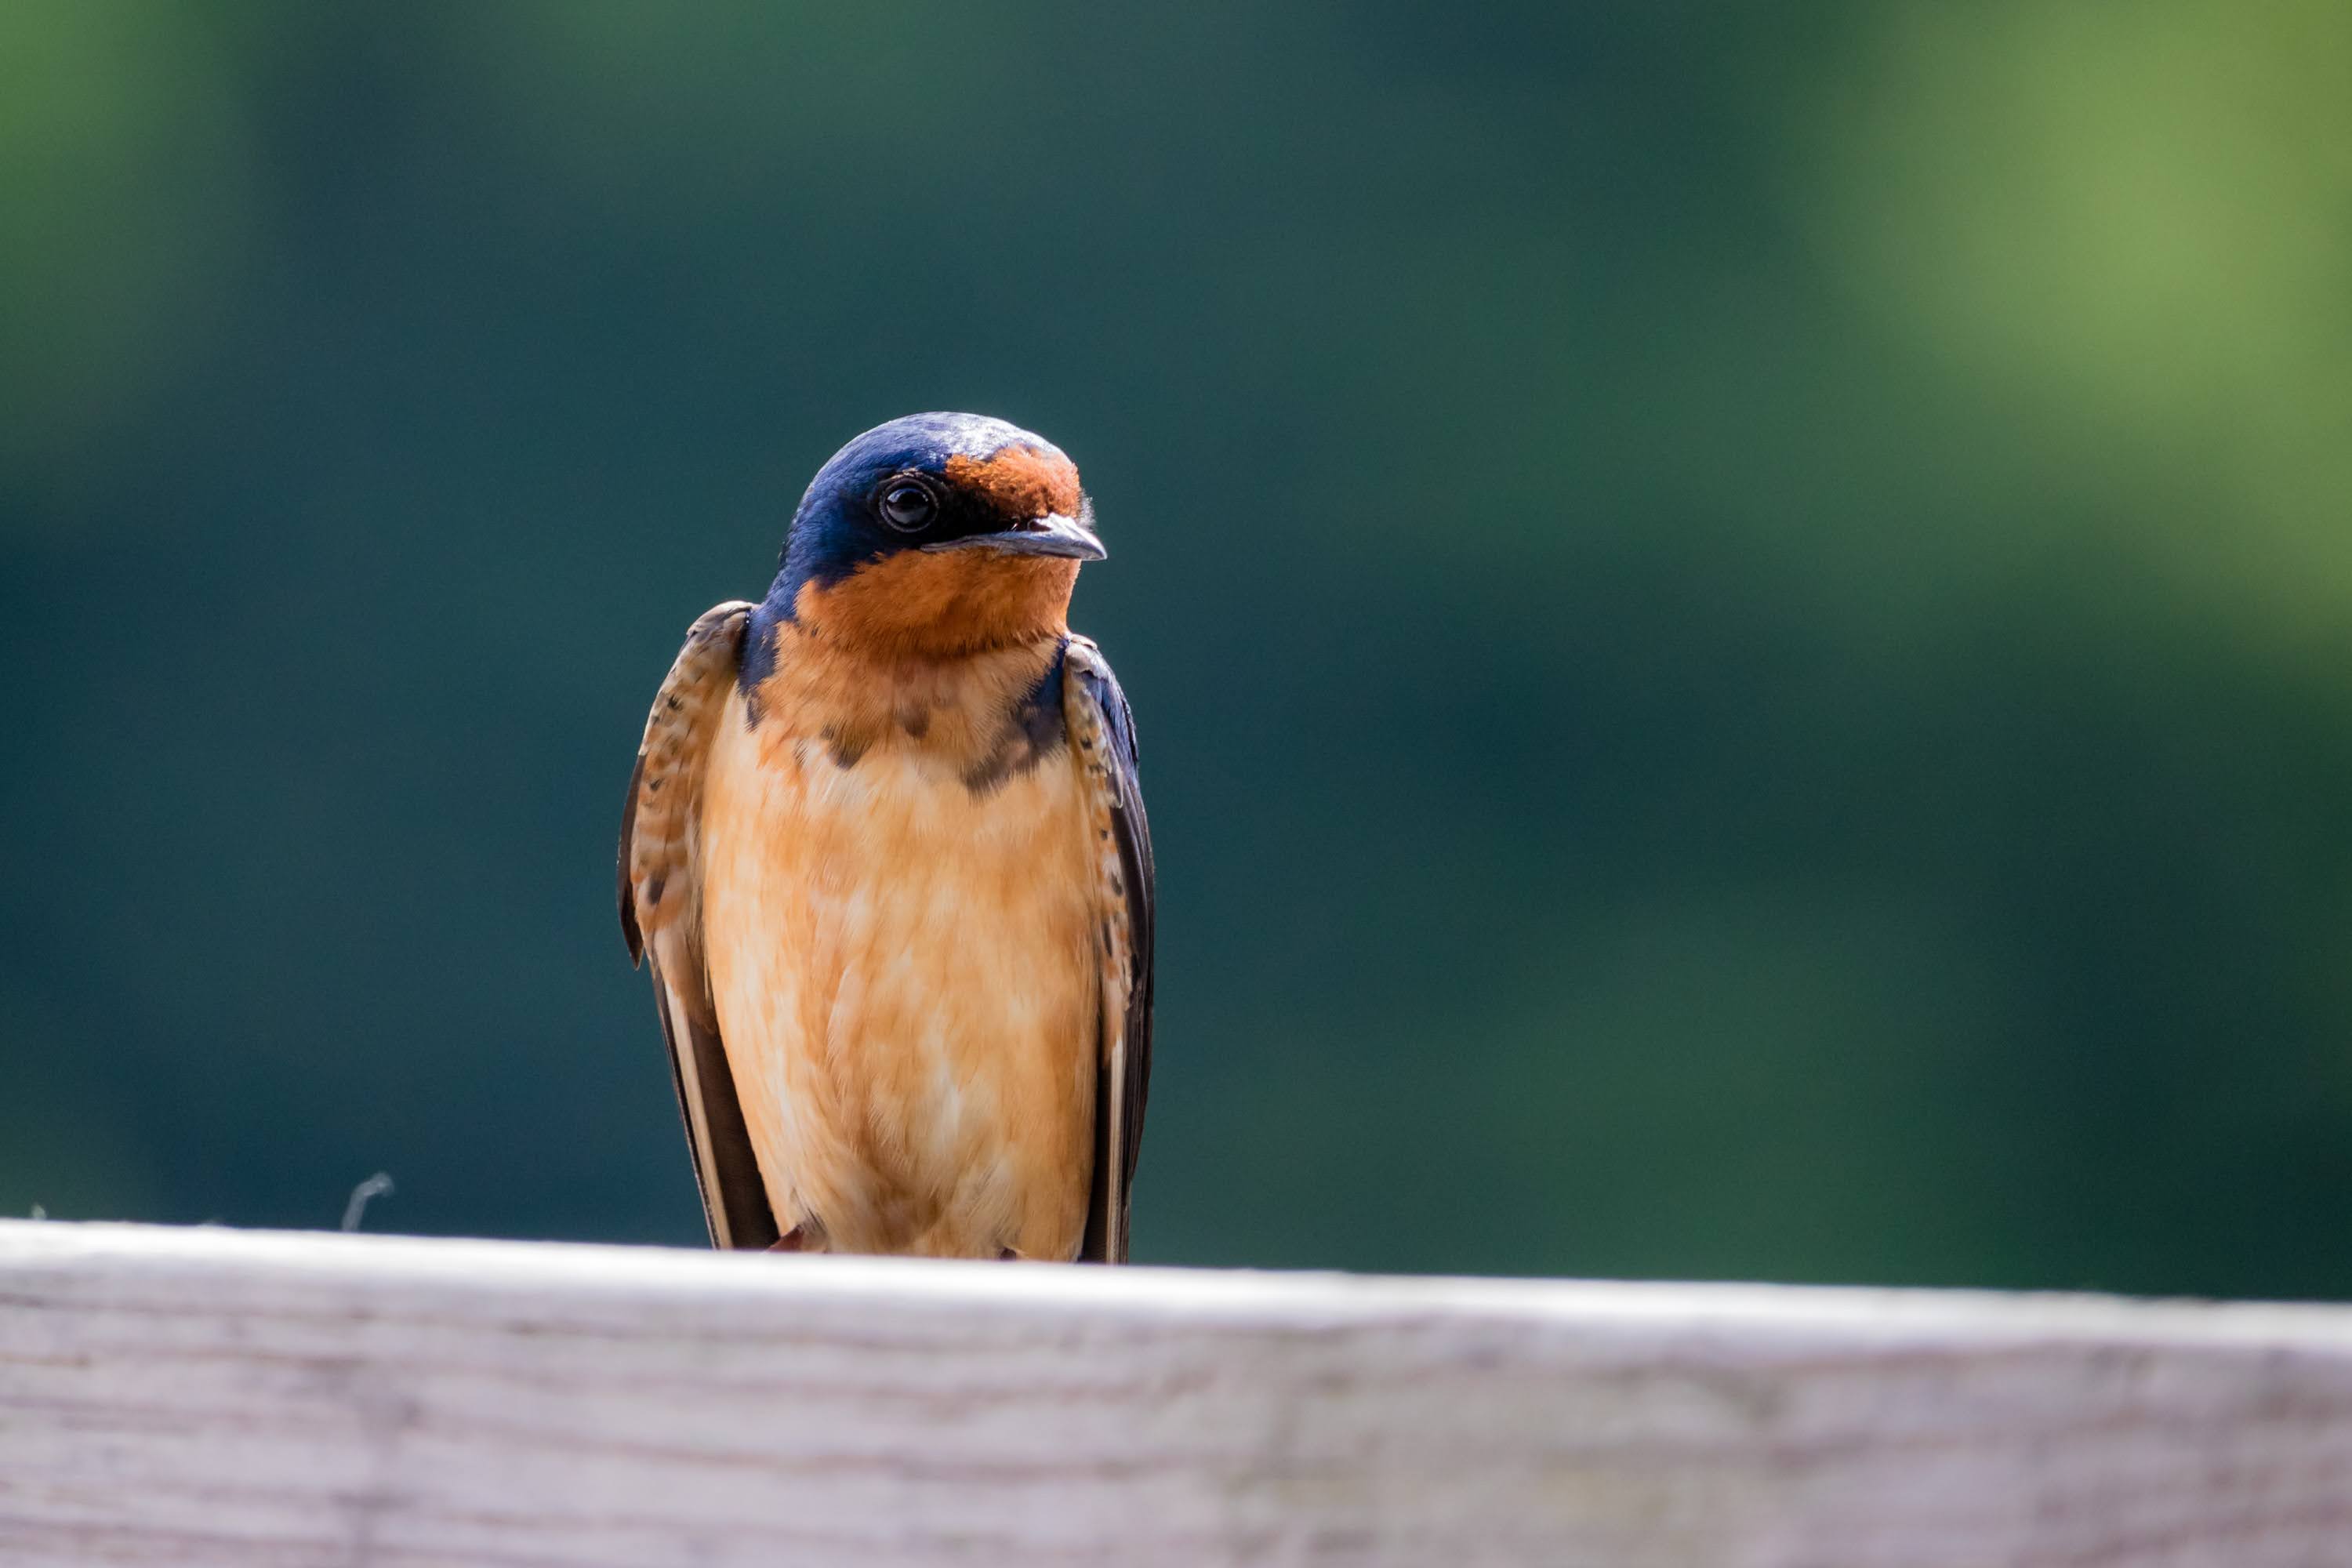
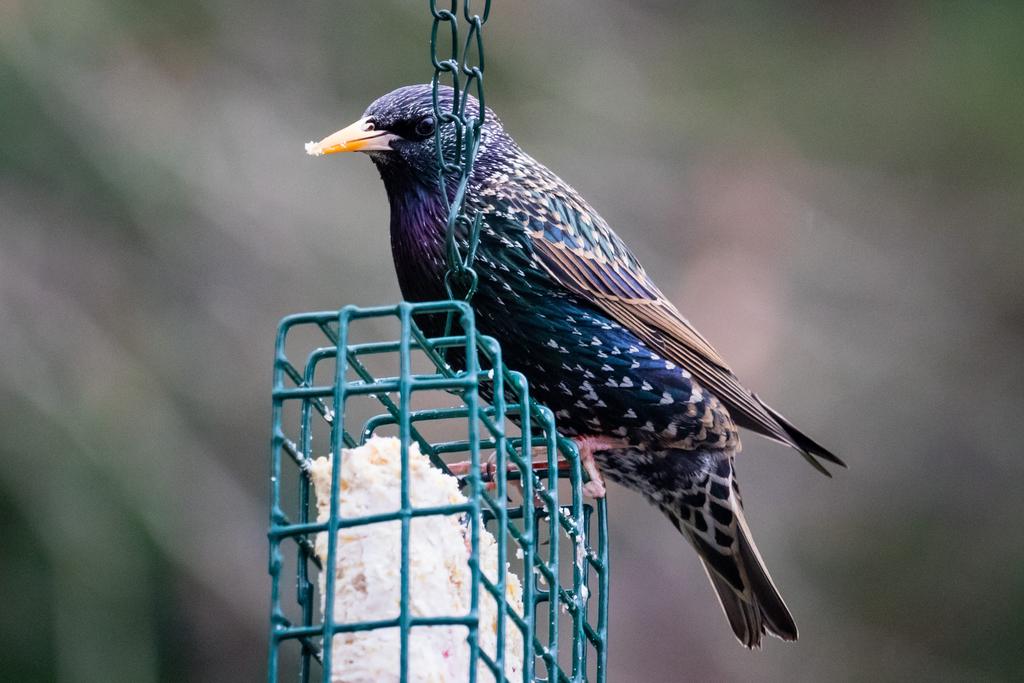
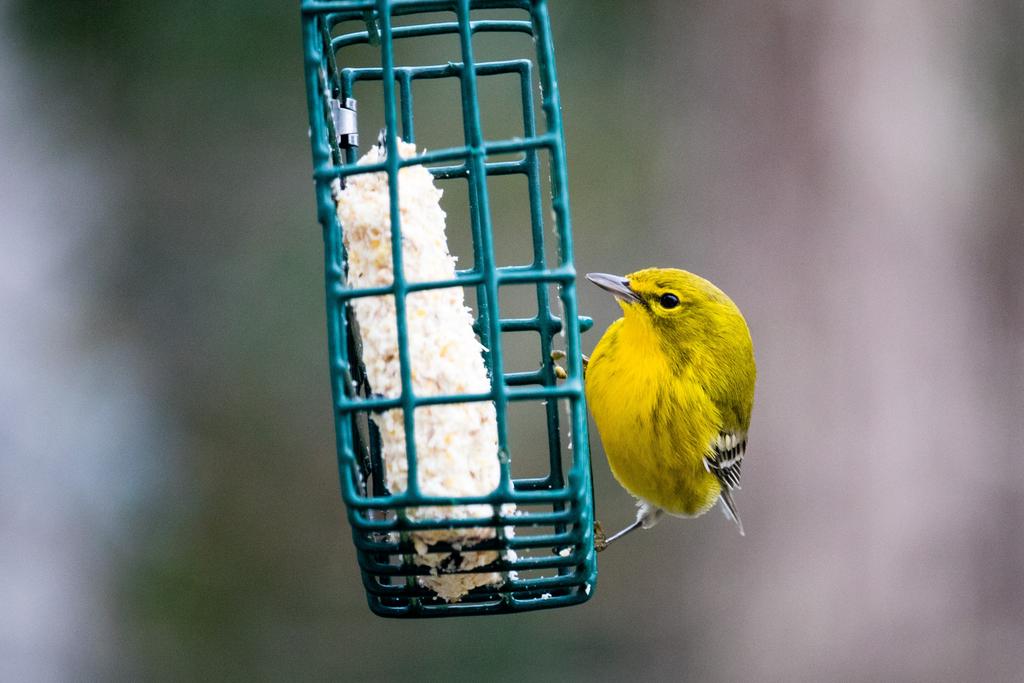
I spent some time this afternoon making an alternate edit of a recent photo I took of a barn swallow at Lake Lynn in Raleigh, NC. Take a look at the following two images (click to enlarge):

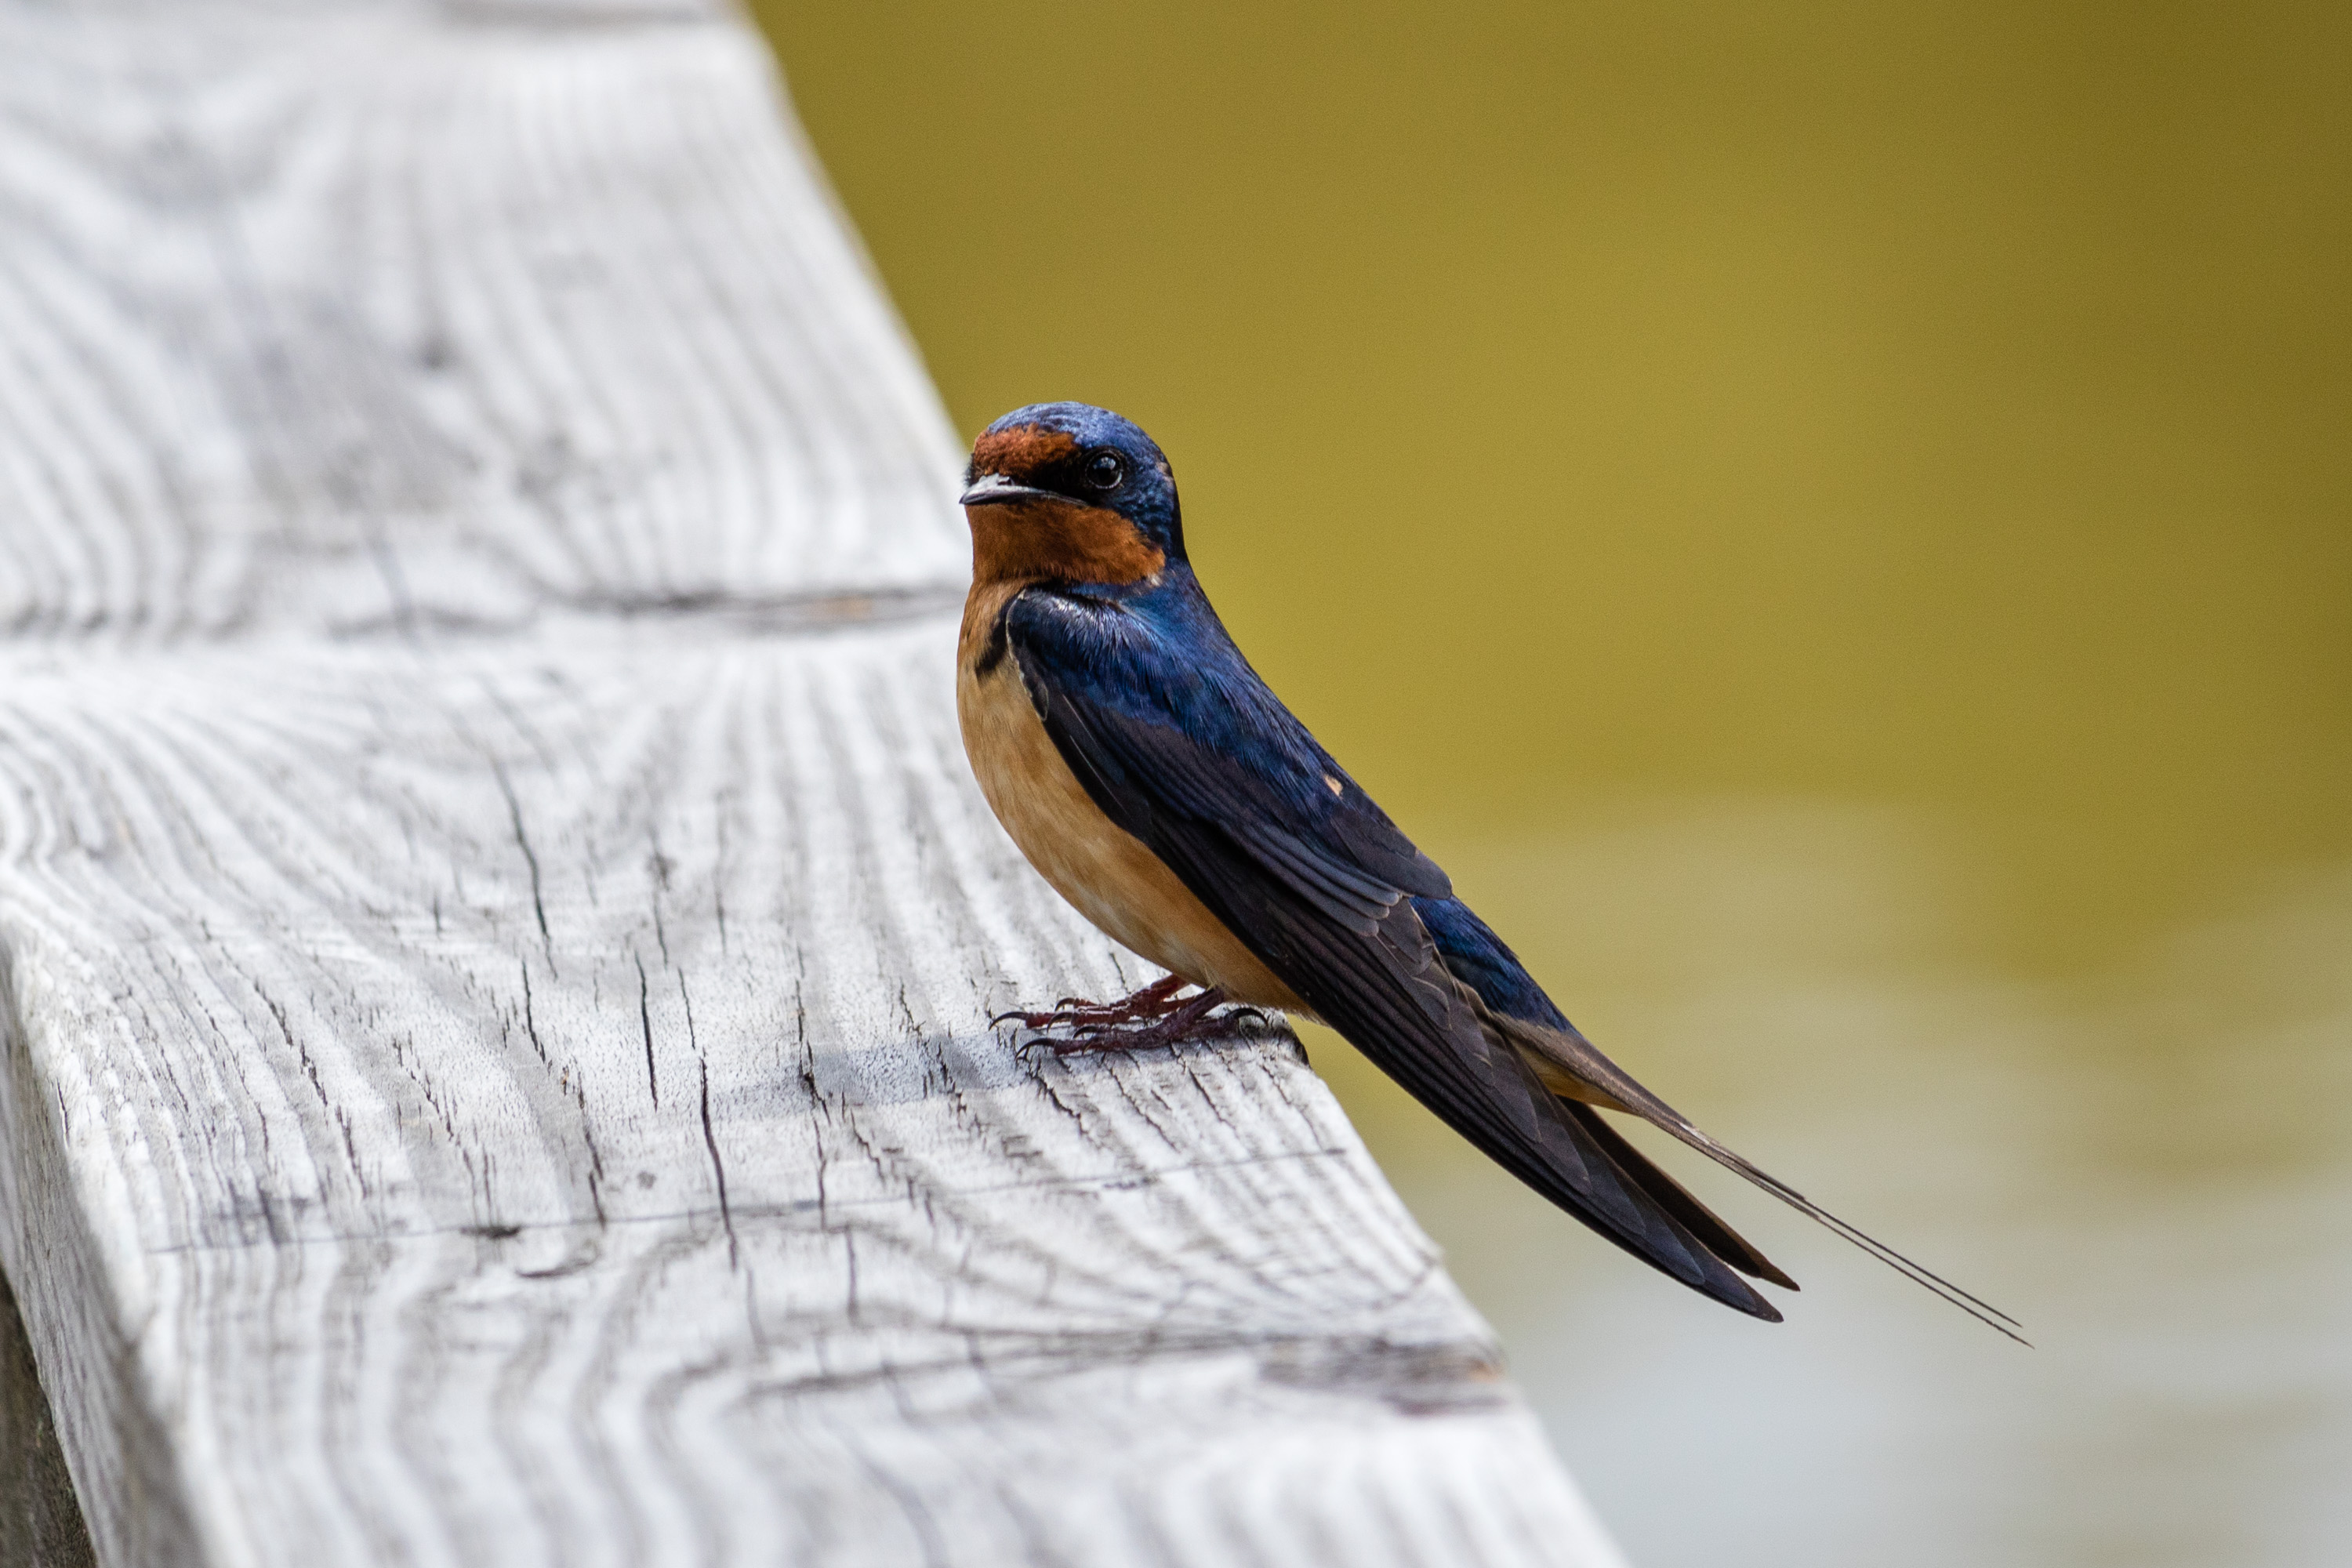
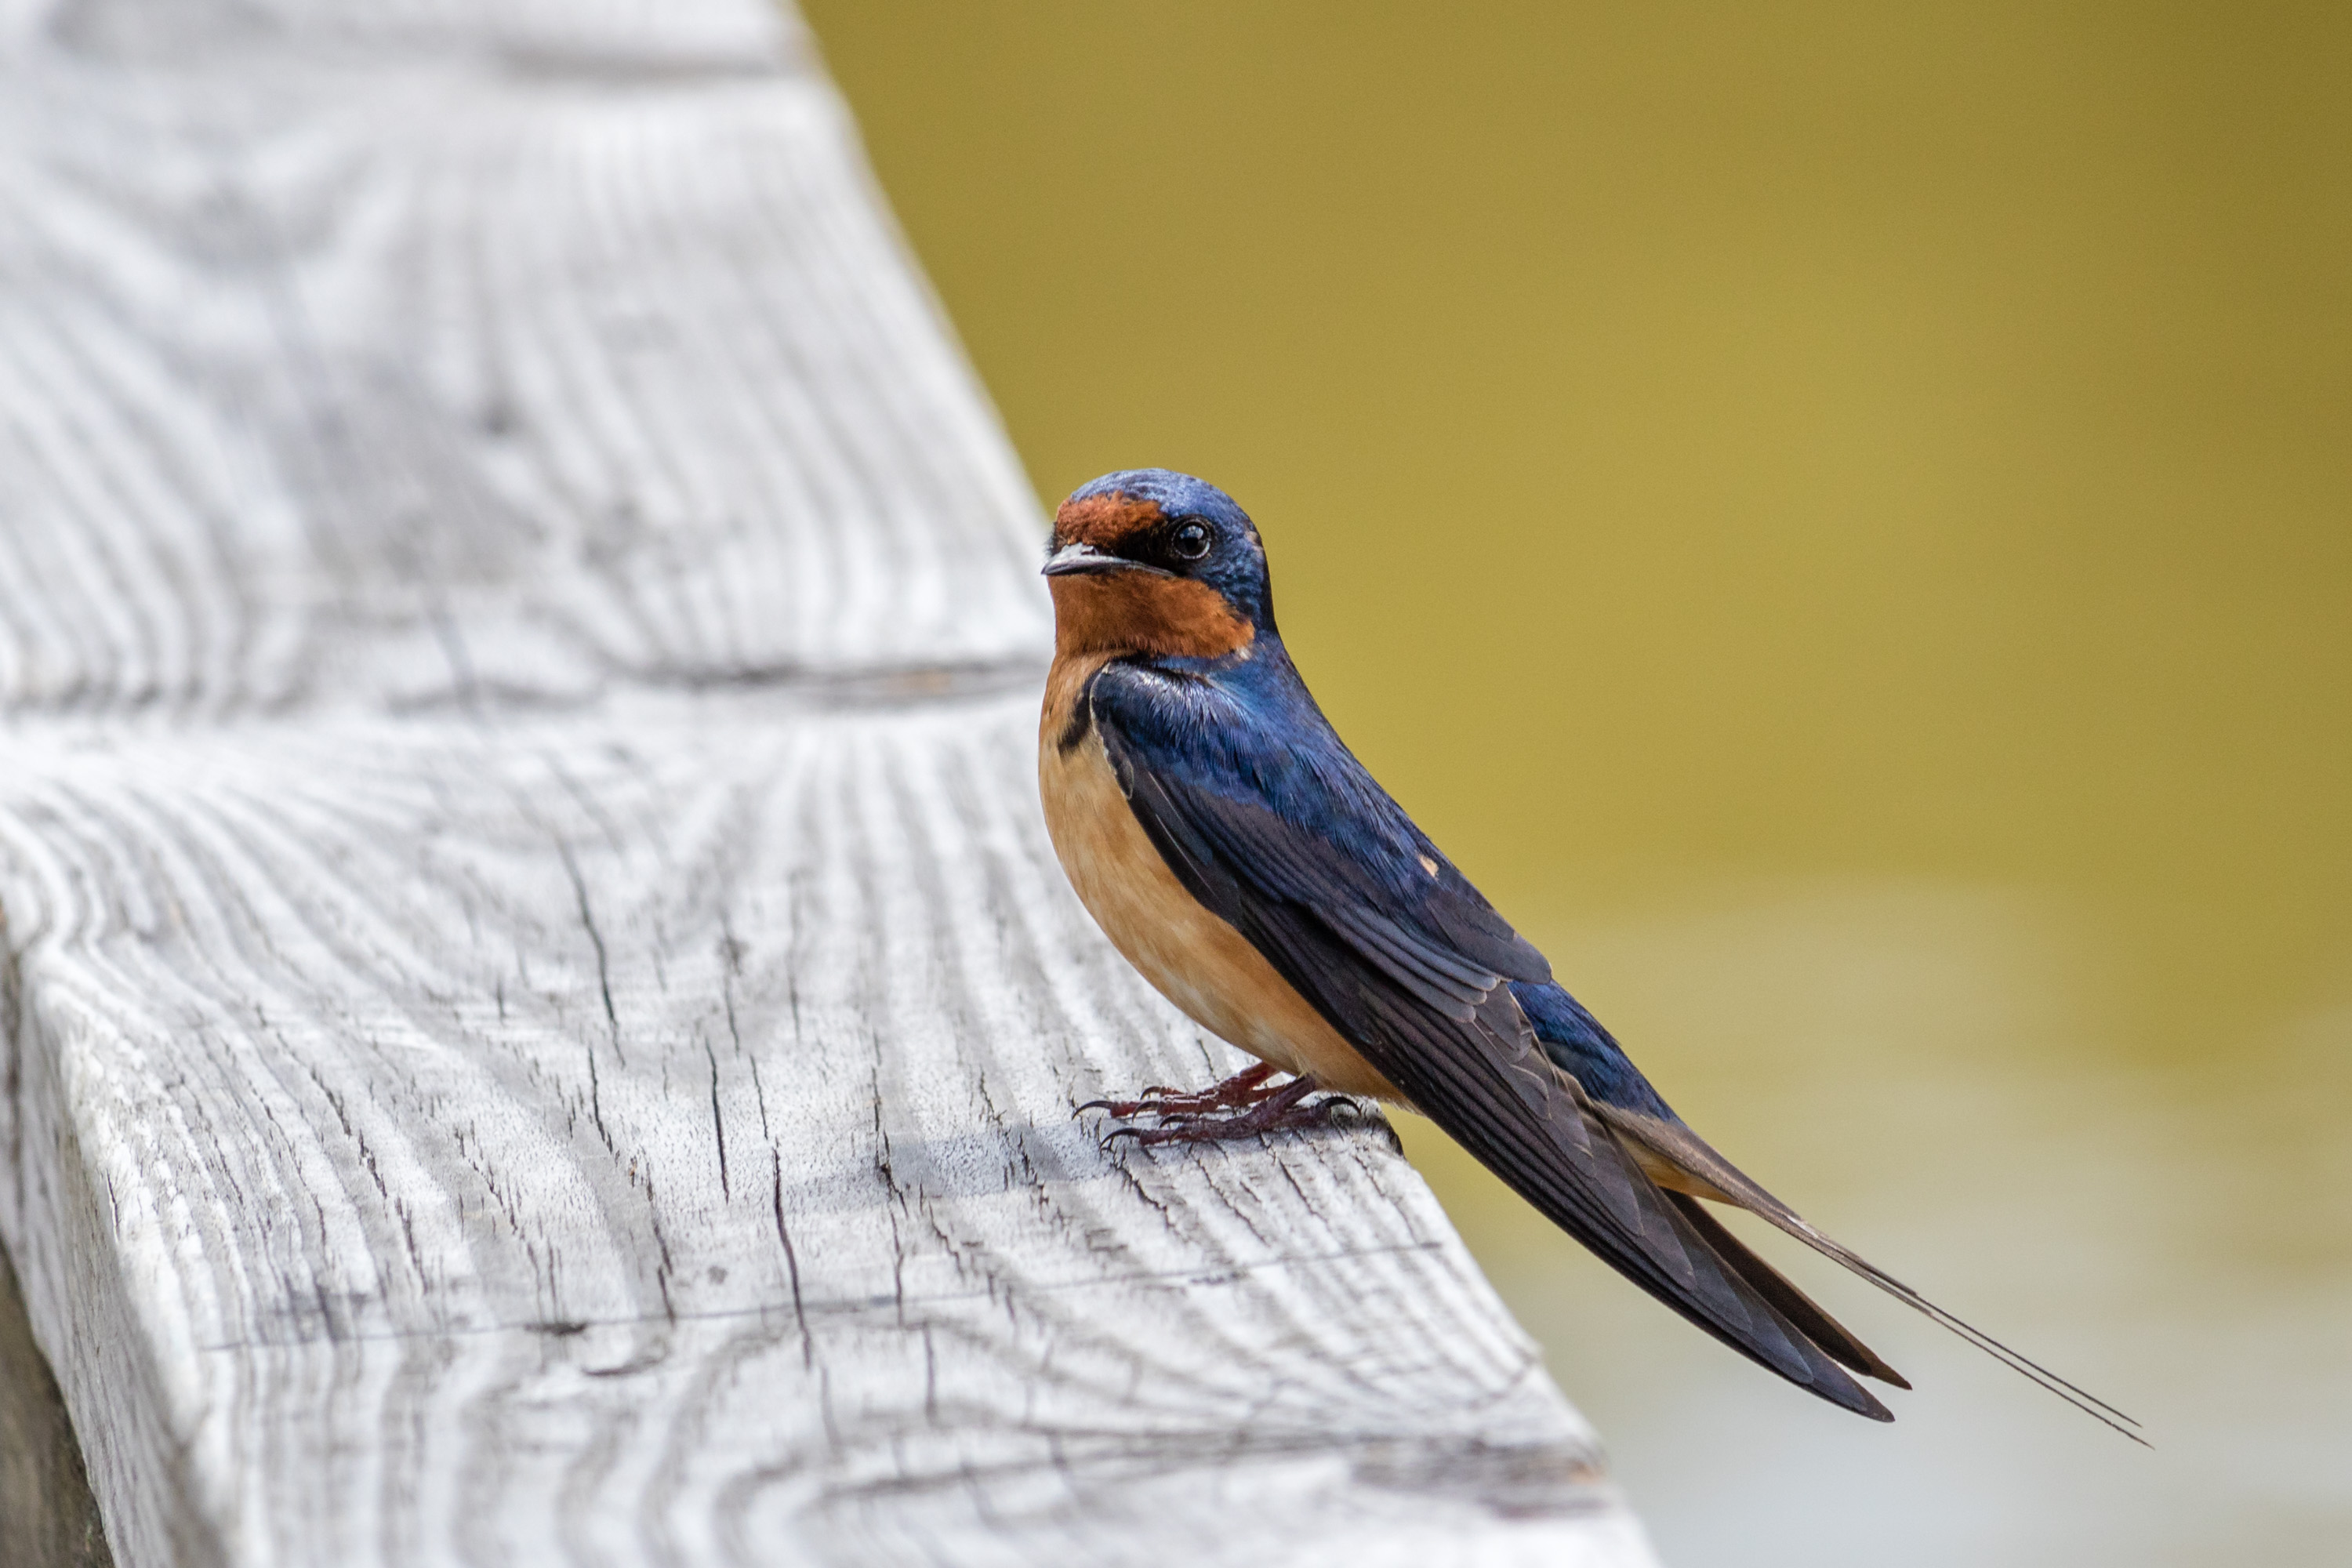
The first image was my original "quick pass" at editing: global adjustments only. The second image was done with a little more care: I adjusted specific sections of the photo individually, spending more time in the process. I also adjusted the crop of the second image (the first's crop was a little off, in my opinion).

This particular bird was backlit in the photograph, making the side towards the camera much darker (as can be seen in the first image). I brightened that up considerably for the second image. Are the adjustments in the second image too much? Who's to say, really? It's an interesting problem to think about. Where is the line between reality and creative freedom?

My ultimate goal is to produce the best possible pictures I can. Much of that process begins with taking better photos to begin with, as post-processing can only help so much. Taking better photos requires practice which, happily, I'm getting more of with each passing day.

Overexposing Images

Jul 2, 2021

Here's a neat tip I recently picked up from a YouTube video. When shooting a subject against a bright background (e.g. shooting birds against a sky), move the exposure compensation on the camera up about a stop (or even more, if necessary). The photo below of a red-tailed hawk was shot with +1 exposure compensation, and it didn't take much tweaking in Lightroom to get a nice looking image. You can click the image to get a larger view of it.

Prior to learning this tip, I've ended up with a ton of disappointing birds in flight photos. No more!

Red-tailed hawk; +1 exposure compensation

Gear Envy

Jun 20, 2021

I seem to have a knack for choosing expensive hobbies. Photography is a prime example of that, where the sky is the limit in terms of how much certain gear costs. Every aspect of photography can be ridiculously expensive. Want a nice camera strap? $65 will get you one. Looking for telephoto lenses? Some of the nicest primes sell for $13,000!

As I've been getting back into photography, I've been voraciously watching related videos on YouTube. In so doing, I've found it super easy to get envious of the gear that some people have access to. I have to constantly remind myself that:

  1. Lots of the gear that people use (especially on YouTube) may have been provided by the manufacturer, in return for coverage on their channel.
  2. Many of the people on YouTube are professionals, where it makes sense to have nicer gear.
  3. Chasing better gear can become a never ending cycle, as camera bodies and lenses get better and better over time.

Good gear can certainly make things easier in photography, but the old adage that a poor craftsman blames his tools definitely applies. As a hobbyist, I want to take the best photos I can, but I also don't want to take out a mortgage to do so. Striking a balance between affordability and performance means having to do my homework when it comes to researching options.

A recurring struggle I have with photography is in the sharpness of the photos that I take. I feel like I'm getting better in general, but I still struggle more than I would like. Take a look at this photo of a female brown-headed cowbird that I took back in February:

Brown-headed cowbird (female); soft focus

This is a really lousy photo in my opinion. To be fair, the conditions I was shooting in weren't great: it was a cloudy day and I was shooting hand-held through a kitchen window. Compare to this much sharper photo I took in March:

Brown-headed cowbird (female); sharp focus

Again, I was shooting hand-held, but I was outside at the time and the lighting was better. The results are much better, though still not perfect. It's frustrating to get bad results when I know I'm capable of so much more. There are a few ways that I'm planning on improving my success rate:

1. Switching Camera Modes

I'm pretty bad about letting the camera make most of the decisions when I shoot. I need to be shooting in shutter-speed priority mode more often, which would help me minimize subject motion blur.

2. Using Camera Support

Using a tripod takes a lot of time, but it's almost always worth it in terms of results. Given that I've got two young kids, however, taking a tripod along on family outings isn't always ideal. I want to start using my monopod more often as a compromise. Though not as stable as a tripod, a monopod should provide enough stability to help minimize camera shake. It should certainly be a step up from hand-holding.

3. Better Utilizing Depth of Field

This is a tough one to master, but I feel like I don't put enough thought into best utilizing the given depth of field for each shot. Sometimes I'm way too close to my subject, resulting in a super-shallow depth of field. Other times, my lens aperture is way too low, letting in additional light at the expense of a reduced window of sharpness. I've got to get better at anticipating what any given scene requires, and then using that setup. Becoming an expert here will simply take practice and experimentation.

As with any hobby, a lot of the fun comes with improving your skill. When I look back to photos I took at the beginning of my digital photography journey (an example of which is shown below), I can see that I've come a long way.

Terrible photo of a bird in the NC Zoo aviary

Birding Photography

Jun 14, 2021
Barn swallow

Photography has long been a hobby of mine, but I haven't put much effort into it in the past few years. Happily, this has recently changed thanks to my relatively new birding hobby, which I've tangentially written about a couple of times. I'm taking more photos than I have in a long while, and it feels great to jump back into the hobby (as an aside, it's interesting how hobbies can ebb and flow with time; I haven't done much woodworking this year, but photography is filling the void).

I have started a new photo album cataloging the majority of the bird photos I've taken over the past six months or so. I plan to keep this album up to date as I take new photos, so check back every once in awhile to see what's new. I hope to post additional photos over the coming weeks in other new albums.

Backyard Wildlife

Jan 18, 2021

We've had a bird feeder in our backyard for a few years now, but I've only ever half-heartedly watched the birds that come to it. This year for Christmas, my wife requested (and received) the addition of a suet feeder. Between the cold of winter, the never ending lock-down of this god forsaken pandemic, and my general boredom, I've been spending a lot more time actually watching the birds that visit our backyard. More importantly, I've also been photographing these birds, as well as other wildlife we see around our house. This Backyard Wildlife album is the result. As an aside, this is the first public photo album I've published since 2019!

I can emphatically say that I now enjoy watching and identifying the birds that visit. Prior to this endeavor, if you had asked me how many different types of birds come to our feeder, I would have guessed 10, maybe 12. As of this writing, I have photographed 26 different species of birds in and around our house. I've seen a few more which have yet to be photographed (some birds, it turns out, are fairly difficult to shoot). As a result, this album will be a living album; I plan on adding to it as I shoot new pictures.

My self-imposed criteria for this photo album is that all photos must be taken from the area immediately surrounding my house. There will be no duplicate species photos (with the exception of variants by sex), and I will replace photos over time with improved versions as I am able (a few photos are fairly rough, due to the birds' ephemeral visits). If you have a bird feeder in your yard, take the time to watch the birds that come. You'll be surprised at what's right in your backyard! If you don't have a feeder, be sure to get one; it's great, cheap fun.

Here are a couple of teaser photos from the album:

We visited the J.C. Raulston Arboretum in Raleigh today. If you've never been, check it out; it's particularly nice this time of year. I of course took my camera and got some macro photos while there.

NC Zoo Photos

Oct 4, 2018

My wife and I visited the NC Zoo recently, and I naturally took my camera. Here's a look at what we saw.

Photo Post-Processing

Jun 24, 2018

I know that in the world of photography, post-processing is a very personal topic. Every photographer has a different workflow, especially when it comes time to process their photos. Mine has always been pretty haphazard, and for a long time I haven't been as happy with my photos as I would like.

I shoot RAW images, which ultimately gives me a lot more creative control over the end product. Maximizing those possibilities, however, requires effort that I frankly haven't been putting in. I've recently decided to change that, and I'm already seeing improved results. One of my recent photo albums, focusing on garden macro images, is the first album into which I put extra effort into the post-processing step. I'm really happy with every single photo in that album.

Over the past few weeks, I've been watching a lot of online tutorials on post-processing workflows, tips, and tricks. Anthony Morganti's YouTube channel has been particularly helpful to me (he has lots of great pointers).

I've posted a few photos below to show the before and after effects of what I've learned. All of the "before" shots are photos that are posted in my public albums (all three of these shots come from the Lausanne, Switzerland photo album). If you happen to be reading this in an RSS reader, click through to the site for a better before/after experience where the images are stacked.

The first photo is a shot of a castle we visited. My "before" shot lacked detail, was fairly flat, and was generally overexposed. The "after" shot uses improved color, is a better crop (removing a stray head from the bottom of the shot), and has more detail.

This second photo was taken in the castle above. Again, there was missing detail, highlights were really overblown, and there was a general lack of contrast.

One final example originally suffered from overexposure and a lack of contrast. Note how so much more detail shows up in the leaves of the grapevine.

I'm looking forward to using my new-found skills in future photo albums.

Eno River in April

Jun 17, 2018

I'm clearing out some old photo albums from my backlog, including this one from a visit to Eno River state park in April.

June Garden Macros

Jun 13, 2018

I've posted some new macro photos taken from my garden tonight. The colors in some of these photos are really beautiful, in my opinion. I hope to continue posting new photos like this.

The second set of photo albums from last year's trip to Switzerland have been posted. First up this time is an album on our visit to Lausanne and its surrounding areas (a nice place to visit), followed by an album about Zermatt and the Matterhorn. Enjoy!

Last year, my wife and I spent two glorious weeks in Switzerland. While there, we hiked over 90 miles and visited a number of incredible places. We both fell in love with the country, and we intend to return in the future. If I had enough money, I'd even consider living there (though the cost of living is ridiculous)!

I've finally posted photos from this trip to my photos site. The first two albums cover our visits to Luzern and Wengen. Wengen is my top spot in Switzerland, and is perhaps the most beautiful place on Earth.

I will post two more albums in the next week or so, covering the second half of our trip. Stay tuned!

As I mentioned in my previous post, I learned two photography lessons on my recent trip to the mountains of North Carolina. Today, I will be covering the second lesson I learned. In short, never fully trust your camera's automatic white balance setting. While shooting under cloudy conditions, I found that the automatic setting resulted in photos that were way too cool in color, resulting in inaccurate representations of what my eye saw. Here's a great example from my visit to Mount Mitchell State Park (a wonderful place, I might add):

Photograph taken with automatic white balance

Compare the automatic white balance photo with the following one, which was taken with manual white balance (on the "Cloudy" setting):

Photograph taken with manual (Cloudy) white balance

Note how this second image is warmer in color, with richer greens and reds. This second image is much closer to what I really saw, and the color difference was enough to be apparent in the little LCD display on my camera. The morning I visited the park, weather conditions were definitely cloudy. It's interesting then that the automatic white balance didn't pick up on those conditions better than it did.

One obvious solution to this problem is to shoot in RAW mode (assuming your camera supports it). My camera does not support RAW, and I'm not entirely sure that the additional post-processing work necessary with RAW photos is worth it (though I'm sure plenty of pros would disagree). As I have learned, you're probably better off manually setting your white balance for a given scene. Just don't forget to change it each time you go on a shoot. You wouldn't want to shoot in "Cloudy" mode on a bright, sunny day.

I learned two very important photography lessons during my recent vacation to the southwestern mountains of North Carolina. Today I will cover one of those lessons, and I'll get to the other one in a future post. As you might have guessed from this post's title, the first lesson involves a tripod.

In my previous outings to the various state parks here in North Carolina, I've never carried a tripod with me. On a bright sunny day, it's typically a tool I feel that I don't need; lots of light, a steady hand, and my camera's image stabilization feature help me out. On cloudy days, however, I inevitably end up with a load of blurred shots, especially when in a heavily forested area. On this particular trip to the mountains, I knew I would be shooting a number of waterfalls, so I was willing to haul my tripod down the trail with me.

Since I already had the tripod with me, I found that I used it for way more than the waterfall shots I had intended. Wow, what a difference it made! Instead of lots of blurred shots, the vast majority of my photos are keepers this time around, thanks to this handy tool. I've also learned a few things about the type of tripod I want in the future:

  1. It should be light
  2. It should have a ball head
  3. The adjustable leg locks should be sturdy

My current tripod is a tad bulky, and the multiple controls are a bother to work with. A multidimensional bubble level for my camera's hot shoe connector would also be useful.

In short, if you're planning a photo shoot in a forested area, or you're shooting on a cloudy day, make an effort to carry a tripod along with you. Your end results will justify the extra effort of lugging extra gear down the trail. As an added bonus, carrying a tripod will pique people's curiosity. I struck up more conversations with random people about photography on this trip than I've ever done previously. It's a lesson I'll remember for a long time.

Beautiful Evening

Apr 1, 2010

It's nights like this that make me glad to be alive.